If you’re looking to build a scalable and maintainable REST API with Node.js, Express is the go-to framework. In this tutorial, we’ll cover the fundamentals of building a REST API with Node.js and Express. We’ll focus on the HTTP methods (GET, POST, PUT, and DELETE) and how to handle them using Express. By the end of this tutorial, you’ll have a solid understanding of how to build a Node.js REST API with Express.
Step 1: Set up the Project
First, let’s create a new project using Node.js and Express. Make sure you have Node.js and npm installed on your machine. You can create a new project by running the following command in your terminal:
mkdir node-express-rest-api
cd node-express-rest-api
npm init -y
npm install expressUsing the -y option with npm init command skips all the prompts that typically appear during the project creation process, allowing you to create a new npm project without answering any questions.
Step 2: Create the Server
Now, let’s create the server using Express. Create a new file called server.js and add the following code:
const express = require('express');
const app = express();
const port = 3000;

app.listen(port, () => {
  console.log(`Server is listening on port ${port}.`);
});This code initializes the Express app, sets the port to 3000, and starts the server.
Step 3: Add Routes
Next, let’s add some routes to our server. We’ll create routes for handling GET, POST, PUT, and DELETE requests. Add the following code to server.js:
app.get('/', (req, res) => {
  res.send('Hello World!');
});

app.post('/', (req, res) => {
  res.send('Got a POST request');
});

app.put('/user', (req, res) => {
  res.send('Got a PUT request at /user');
});

app.delete('/user', (req, res) => {
  res.send('Got a DELETE request at /user');
});These routes handle the different HTTP methods and return a response based on the request.
Parameters can also be sent as part of the URL by concatenating them and using a colon (:) to identify them. Here is an example that demonstrates how to use parameters:
app.get('/users/:id', (req, res) => {
  const userId = req.params.id;
  // Do something with the user ID, such as retrieve data from a database
  res.send(`User ${userId} data`);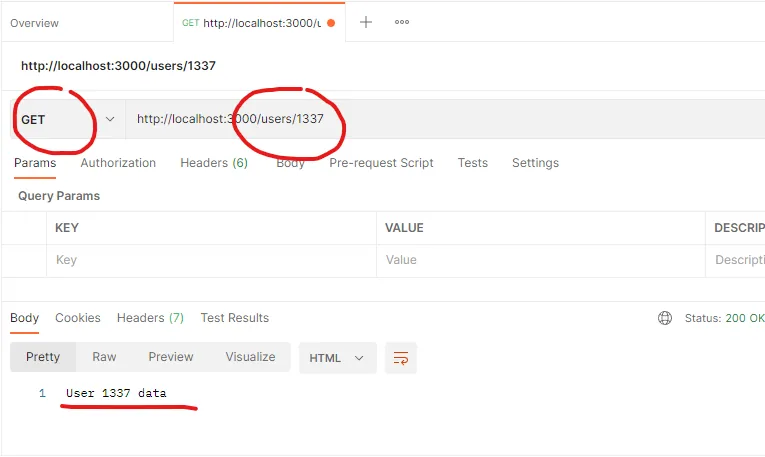
});This route handles GET requests to /users/:id, where :id is a parameter that can be replaced with a specific user ID. The req.params.id property is used to retrieve the value of the id parameter from the URL.
You can then use this user ID to retrieve data from a database or perform other operations. The response message in this example simply returns the user ID as part of a string.
Step 4: Test the API
Now that we’ve added some routes, let’s test the API. Start the server by running node server.js in your terminal. Then, open your web browser and navigate to http://localhost:3000/. You should see the message “Hello World!” displayed on the page.
To test the POST, PUT, and DELETE routes, you can use a tool like Postman. Send a POST request to http://localhost:3000/ and you should see the message “Got a POST request” displayed on the page. Similarly, you can send PUT and DELETE requests to http://localhost:3000/user.
To test the URL with a parameter, simply call it by including the parameter in the URL, like http://localhost:3000/users/1337, as shown in the example picture below:
Step 5: Add Middleware
Finally, let’s add some Middleware to our server. Middleware functions are functions that have access to the request and response objects, and can modify them as needed. Add the following Middleware function to server.js:
app.use((req, res, next) => {
  console.log('Time:', Date.now());
  next();
});This Middleware function logs the current time to the console for every request. You can add more Middleware functions as needed to handle authentication, error handling, and other tasks.
When next() is called within a middleware function, it allows the normal procedure of handling the request based on its path to continue.
Conclusion:
In this tutorial, we covered the basics of building a Node.js REST API with Express. We started by setting up the project and creating the server, then added routes for handling different